6.22.2007

The Making of Corak The Hunter

The Making of Corak The Hunter by philip herman
My name is Philip Herman. I was born in Jakarta, Indonesia but currently I live in Singapore. Now I work for KOEI Entertainment (Japanese video game company) as a 3D character artist. I’d like to share with you guys how I created my image, Corak The Hunter.
Concept
I made this image as a freelance job that I got from Red Eye Studio to create 3D Art assets for their game "Dark Sovereign" that is currently in development. So the concept and designs of the character were made by them. They wanted the image to be liked a movie poster. So I used some references from Pirates Of The Carribean 3, Hellboy, Harry Porter, etc. Here is the concept.
click to web site // content by 3dm

Rigging of Cane-Toad

Building a rig is a lot like building a simple machine that works like a puppet. I know a lot of people who think that rigging as an immensely complex chore. I’d have to agree that it is a chore! But it’s really not difficult at all (just perhaps just a little tedious!) Fortunately the hard work always worth it in the end. In the future I hope there’ll be a lot more automated ways for building custom set-ups.
Maya Tutorials link !!

Maya Tutorial : Rendering better cars

Computer art has published new Maya Tutorial about how to make good looking rendering of a Car. Master the skills required to turn 3D models into professional-looking automotive renders with this set of expert tips from 3D World. Download the tutorial in .PDF format......Link!!
Content by computerart

Video Tutorials : 3DS Max | Maya | XSI

Lots of very useful Video Tutorials for 3ds Max, Maya and XSI are available for free download.
Tutorials Link !!

Creating a Flowing Water Effect in Maya (Using Particles)

New tutorial about Creating a Flowing Water Effect in Maya using "Particles", written by Aziz Khan. This Maya tutorial will teach you how to manipulate the flow of particles from a shower head into a tub as particles collide with the surface of the tub in a water-like motion.

Link to website!

6.20.2007

Sculpting Techniques with ZBrush 3


ZBrush Versions: ZBrush 3.x
Languages: English
Runtime: 258 Minutes
Price: $59.99
DETAILS:
Achieve unparalleled results using ZBrush 3. Learn several time-saving modeling and digital sculpting techniques that are widely used throughout the Film and Games industries. Contains over 4 hours of project-based training. Great for new to intermediate artists

MadInSpain 2007


The site for this year's MadInSpain design conference in Madrid is now live, announcing an amazing lineup of speakers including Wieden+Kennedy, The Brain Box, ATTIK, Group94 and many more. content form computerlove

6.19.2007

Free 3D World tutorial - Perfect digital Skin


Realistic skin is hard to fake because it's both an artistic and a technical challenge. It's artistic because you can almost feel a character's personality through the look of its skin; its wrinkles, colours and beauty spots. But it's also a technical test, because skin isn't like a homogeneous material that has simple physical properties – it's composed of several different layers. However, we always model it as a perfectly even thin surface, which is why it's so hard to get good results. To make matters worse, until recently, 3D software didn't include appropriate rendering tools to make human skin, such as subsurface scattering shaders........more!!Free 3D World tutorial - Perfect digital Skin Link

Featured CG Artists - Nicholas Ainley


CG Artists is Nicholas Ainley, who needs no introduction and his awesome expressive illustrations says much more than i can barely explain. Nik Ainley after teaching himself Photoshop in his spare time while gaining a degree in physics at Imperial College London, has moved into full time web design and illustration. He was listed as one of the 'Top 10 up-and-coming creative talents of 2006' by Computer Arts magazine, and his work has appeared at the 2006 OFFF exhibition in Barcelona. Though Photoshop is his primary tool for creating illustration, Nik has also utilized other applications including Illustrator, 3D Studio max, , Bryce, Poser and Xara 3D.....well their is always more to say... , but you go n check out his Amazing Artwork.-->> Nik Ainley website - Shinybinary <<--

Enzo 3D Paint Plugin For PhotoShop


Enzo is a unique 3d model texture paint system that is fully integrated inside Photoshop. Enzo is not a standalone application, but a set of sophisticated that work together to turn Photoshop into a robust 3d paint package. You can use Enzo to paint directly on the 3d models in Photoshop. Enzo can import 3d models in Maya, XSI, LWO, 3ds, obj, Rhino and AutoDesk FBX formats.Enzo: 3d paint for photoshop - Download Trial

6.18.2007

Zbrush hair-master Plugin 2.0.0

FILE SIZE: 10152 KB
HOMEPAGE: http://brainscannar.spymac.com/
LICENSE TYPE: FreewareZBrush Versions: 2.x

DETAILS:
this come with a video tutorialthis is very easy to use and quite effective

download now!!

Skinny Version 3.8 - Pipeline Skinning Tool

With Skinny you can make Sets for all the body parts and area you want the paint individual.That way you wouldn't affect other areas by mistake. As you know Maya have "normalize weight" feature that change skin value special while using the brush Smooth.
More Features -Smaller and faster Paint weight UI then Maya's -Rotating Joints while skinning. Excellent feature for seen the skin in action without leaving the skinning process. -List Joints by: Aphabetical, By Hold , Graph order. -Hold Joints & influence by: Selected or All -"Remove Influence", just select the joint and remove. -"Zero Weight", show joints with zero weight. -"Create Fullset", create set from SkinCluster members. - "MeshSmooth" to see the model hi-rez while skinning. - "Skinny Active" to active skinning mode and quick exit this mode. -"Save/Load Sets" to file
download now!!

PELTING TOOLS 1.5.4 Beta

we have featured PELTING Tools; a useful Maya plugins scripts before, but recently someone asked me about UV Pelting in Maya, so we decided to feature this very handy script for Maya once again. UV Pelting is the process of quickly unwrapping geometry and generate texture coordinates for a 3d surface. UV Pelting significantly reduces the time required to compute texture UV's because; instead of stitching various patches together to create maps, the modelers can easily select the "pelting" edge path and generate the connected map automatically. PELTING Tools is developed by sunit parekh, who also explained how-to work with pelting tools quite nicely on his website. The Pelting Tools version 1.5.4 for Maya 6.x-8.x is available for download and it is compatible with Linux, windows as well as Mac.Pelting Tools Features:- Linux, Mac, Windows Compatible
- Mesh and Component Part based pelting
- Multiple pelt groups in one scene
- Direct connection to original, uncut mesh
- Two different pelting frame algorithms
- Per vertex spring controls
- Multiple model views
- checker, baked normal
- Edge coloring on cut and border edges
- Orient set orientation and mid-line axis
- Loop functions from OMTOOLBOX integrated
- Quick to simulate with Hi-Res 3D Models
- User created script macros
- UV Tweak Mode for pelted and non-pelted
- Frame Attractors
- Flexi FramesSome video's exploring the various features and basic pelting workflow in Maya 6.x - 8.x is also available on sunit parekh's website. For more information about Pelting Tools and its download, please visit www.sunitparekh.com/pelting/

Advanced Skeleton 2.0 For Maya

Another very handy tool for character Rigging, developed by Animation Studios Australia, and its now made totally free. AdvancedSkeleton Pro is a collection of Autodesk's Maya tools for doing character setup. Creating a Skeleton Setup for characters that works well, is a cumbersome job that includes: animation constraints, expressions and driven keys as well as fitting of the skeleton joints to the character. AdvancedSkeleton was designed to do most of this, so you can get your character setup done much faster. AdvancedSkeleton creates a complex motion system called AdvancedSkeleton from a simple joint chain called FitSkeleton. You can download the latest free version of AdvancedSkeleton from Highend3d.com.Download Adv. Skeleton

Dosch Design has Released New 3d models and Textures Products


Just got a mail from Sebastian Dosch informing us about the launch of three new 3d products and two new product lines by Dosch Design. I didn’t want to put the press release as usual instead decided to write couple of lines about their 3d products. I am pretty much sure that most of you have heard about Dosch Design and their 3d products, but for those who haven’t heard about them, Dosch Design is "The Best" company which offers ready to use computer graphics 3d products. I have been working on/off in this industry for past six years and very much impressed by their consistency of providing fabulous 3d products with Great deal of attention to product detail and quality. Though I have known and heard about Dosch design previously in/from forums, web news, message boards etc. I formally come in contact with the company while I was looking for the sponsors for the 'Galaxy explorer' - contest, and the 3d products they are offering really caught my eye while surfing on their website, specially the "Detailing" and different Variety they offers in their 3d product lines. I have yet to see any other company which is offering so many varieties and offers as-high standard quality in their 3d products. Dosch Design Really has established it self as Benchmark among the 3d design-related products providing Companies…..Anyways I come back to the news; - following are the new 3d products and products-lines introduced by Dosch design:Three New 3d ProductsDosch 3D: Buildings V2 (3d models)Dosch 3D: Fun Crafts ( 3d models)Dosch Viz-Images: Foreground Plants & Trees (Textures/Image)Two New 3d Product-LinesDOSCH CAD – 3D models for all popular CAD-ApplicationsDOSCH DVD Ambience - background animations

LightWave3D to zbrush and back Guide!!


LightWave3D to zbrush and back Guide by Carlo Macchiavello..CGI- Carlo Macchiavello publish this guide to help all lightwaveuser to work better and fine with zbrush 2.0. The Guide describe two diffrent workflows; 1)Modeling in Lightwave3D, detailing and sculpting in Zbrush, animation and rendering in Lightwave3D. 2) Modeling in Zbrush, animation and rendering in Lightwave3D. Download this guide to improve your workflow in Lightwave and Zbrush......Download Link!!

Tutorial : Detective in Zbrush!


Snehal Gopal have created this character of Detective in Zbrush, for getting familiarized with Zbrush and explore its various aspects. Now, In this brief tutorial Gopal explains how he modeled, textured and rendered the character using Zbrush. You may download (.pdf) or read Tutorial -"Making of Suraagh Rusaan - The Detective", which is featured on CgArena and 3dm3.com.Related links:Detective in Zbrush-CgArena ( Html)Detective in Zbrush- 3DM3.com ( HTML+ .PDF)

Zbrush Tutorial - Detailing Body Work


Computerarts has posted very comprehensive Zbrush tutorial about modeling the human body. The tutorial explains how to recreate the fine details of the torso and arms of a male figure. The rough 3d model, posed as a low-resolution mesh has modeled in Maya, and then detailed work was carried out in ZBrush. The tutorial has been broken down into several sections, each covering a single part of the body. The base mesh is also available for download along with the tutorial in .PDF format (21mb)..................download tutorial!

3D Modeling Tutorial - Body Beautiful


Computer arts, has published new tutorial by CG artist Alessandro Baldasseroni , who explains how to make an anatomically correct Human 3d model . Alessandro ; The cover star of 3D World 75 is actually an unclothed version of a character I had already created for a series of images on my website. The model was crafted in 3ds Max using subdivision surfaces, with Photoshop used for texturing, ZBrush for all the fine anatomical-details, and Brazil r/s for rendering. However, the original model lacked detail, mainly because the figure was originally created with clothes. For the purposes of the cover, it was necessary to show this very fine anatomical detail, so I generated normal maps in ZBrush to achieve the desired level of realism. The tutorial is in .PDF format and support files are also available for download......Give it a shot !!

Advanced illumination in 3ds max

Even if very often I like to write about Vray or Maxwell don’t forget that 3ds max has a feature called “Advanced Illumination“.
The net is quite plenty of V-ray tutorials, so I like to mark this interesting tutorial, wrote by the Cg Artist Mario Malagrino, about Advanced illumination in 3d studio max.
The subject is the usual and famous teapot, perfect as an object test… and the technic simulates the illumination techniques of a photo studio.
As I often write the classical method is of the best way to get beautiful lighning in your renders.
3ds: Advanced Illumination
If you are interested in photo studio loghtning have a look at Digital studio with V-ray

Tutorials: Maya: Dome Based Lighting


3DKingdom has published new tutorial about Dome Based Lighting in Maya 8.0. Basically its a pretty old method of achieving photorealism and a slightly altered process of Dome based lighting can be used for faking Global illumination (without Radiosity / third party render), but in this case mental ray is used to achieve better results. Besides , This process of dome based lighting can be used in most of 3d packages such as 3ds Max, etc. The main motive behind is to replicate the indirect light coming from sky, environments etc... Oops, just got carried away, I should shut my mouth here or better write some tutorials myself....Anyways, Snippet; "3DK member Aziz Khan (better known as aziz3d) submitted his latest tutorial which is about Dome Based Lighting in Maya 8.0. This is very simple and time-effective method of rendering your 3d models so they feel almost like real”. So have a look.........Dome Tutorial!!

Maya 3d Modelling workflow - CAR P1


This is the first part of 3dworlds Maya Tutorials about; how to create a Highly detailed 3D model of a CAR? Snip: 3D computer games have traditionally been hampered by limitations in hardware, but things are changing. In the first of two tutorials from 3D World, we discover how to create a highly detailed fit for the next-gen road. The first part will focus on , using a combination of ‘traditional’ polygonal box modeling and subdivision surfaces. The Author assumes that you are already familiar with Maya’s modelling workflow, so if you’re new to the software, we advise you to check out Autodesk’s supporting material first. Next month, 3dworld explore the process of laying out UVs, setting up materials, and arranging the meshes hierarchy ready for export in 2nd part. Car 3d modelling in Maya - Tutorial Link

Maya and Mudbox Workflow Tutorials


Maya Mudbox workflow Part 1The first tutorial covers the flowing:
Model preparation in Maya
Introduction to Mudbox
Mudbox sculpting techniques Downloal Video Tutorial 1 - Click here


Maya Mudbox workflow Part 2The 2nd part of tutorial covers the flowing:
Creating displacement maps
Converting to map files
Mental Ray Render settings
SSS shader Downloal Video Tutorial 2 - Click here

Tutorial Maya 3d: free tutorial about skin shader

A new video tutorial about Maya 3d.
Preparing skin shaders it’s a very complex operation, there are many things to consider.
This is the goal of a new maya video tutorial appeared on GnomonWorkshop, famous site for is excellent video tutorials. I liked very much all vray videos: exteriors and interiors.
In these video tutorials, Alex Alvarez show us about human shading: sss (sub surface scattering), photorealistic eyes etc etc..
The tutorials are made for maya 3d users. You just have to subscribe and download it all for free.Enjot iy!
Maya: Tutorial per lo Skin shading

ClayTools and FreeForm digital 3D modeling systems


Not many CgArtists are aware about these Out-of-the-Box tools which features touch-enabled 3D Modeling solutions for digital content creation. Both ClayTools and FreeForm are touch-enabled modeling applications which use a device called PHANTOM Haptic Device for 3d modeling and sculpting. The PHANTOM Haptic Devices comes in two variant; the 'PHANTOM Desktop and PHANTOM Omni haptic device' which are true 3D interfaces with force feedback that enable designers and modelers to use their sense of touch to model with virtual clay; just like real clay.
ClayTools works with PHANTOM Omni™ haptic device, while FreeForm Modeling system works with both variants. Among these two variants, the PHANTOM Desktop delivers higher fidelity, stronger forces, and lower friction. ClayTools system offers fast organic shapes Modeling for Digital Content Creation & Fine Arts, while FreeForm offers modeling with precision for product design and rapid prototyping. ClayTools system can be used with 3ds Max®, Maya®, Rhino™, and other design applications that support .stl and .obj. All-n-all a note-worthy product especially if you are weak in; usually a tedious job - "organic modeling" or your studio wants to improve 3d modeling productivity.For more information, please visit: www.sensable.com/products-sensable-overview.htm.

Photoshop Plugin for Google 3D Warehouse

SAN JOSE, Calif. - (May 31, 2007) — Adobe Systems Incorporated (Nasdaq:ADBE) and Inc. (Nasdaq: GOOG) today announced the Photoshop® CS3 Extended plug-in for the Google 3D Warehouse, enabling Adobe® Photoshop CS3 Extended users to take further advantage of the software’s powerful compositing, painting and image-editing toolset for editing 3D content. With the plugin, users will be able to query and download free 3D content from the Google 3D Warehouse, Google’s free online repository for and content, directly within Photoshop CS3 Extended. 3D Content then can be placed, manipulated and used in composites with the new 3D tools in Photoshop CS3 Extended. The plugin is available for free download from the Adobe Labs Web site at http://labs.adobe.com/.
Labels:

Two Free Zbrush Tutorials by DT


Digital-Tutors has published two new handy video tutorials for recently released 3.0. In First Zbrush tutorial you will learn; How to use poses and new powerful feature "3D layers", which is introduced in release 3.0 of Zbrush. Using handy 3D layers system user can turn each individual layer on and off or even blend the poses stored in these 3D layers......lesson one!The Second tutorial is workflow related, shows you how to maintain sculpted details of your 3d mesh while switching between ZBrush 3 and other 3D applications. Tutorial show you the exact method of exporting the base mesh from ZBrush, edit it in another application, and re-import it into ZBrush while keeping all the sculpted detail.........lesson two!

Textures with TextureBook


Well, found this interesting TextureBook recently on Amazon,… Although I haven’t bought it, but seem quite good enough to be featured on CGIndia. This handy TextureBook comes along with a DVD featuring 120 ready to use, awesome for 3d Design and illustration.
Author Von R. Glitschka says:"I Created thisbook for the artistic soul. I hope you have a blast using it for your owncreative pursuits. It's timeless resource of real-world surface along withcorresponding example of how they can be artistically applied in design andillustration projects - Enjoy!"yeah, I am pretty sure they will... and those who are unfortunately suffering from "deficiency Vitamin 'M' syndrome" can also enjoy by downloading some high-Res. Textures for free....so enjoy homeBoyZ(link)!
Labels: ,

StarCraft II cinematic teaser


starcraft2.com has published a new behind-the-scene Interview with Nick Carpenter about making of the StarCraft II cinematic teaser. The cinematic teaser trailer is also available for download.
Nick Carpenter says: "The idea of turning thecreation of a marine into a cinematic has been on my mind ever since we started working on the cinematic for the original StarCraft. When you click on that button to build a marine, what does that mean? Actually showing the marine being built gives us an exciting opportunity to show that in the StarCraft universe, even something that's normally very mundane can have a truly epic feeling to it."
Go behind the scene of Starcraft II with Blizzard's cinematic creative director, Nick Carpenter and check the teaser trailer of StarCraft II - Click Here!

CG News Tid-Bits

+ 3dm has published 'Fury of serenity' tutorial by Henry Pashkov.+ Adobe has updated its newest version of Bridge to version 2.1 for CS3 users. The update is available through the Adobe Updater or via direct download.
+ Apple has updated its MacBook Professional line with speed boosting components and stunning features like new mercury-free LED displays and super fast NVIDIA GeForce 8600M GT video cards (with either 128 MB or 256 MB of VRAM).+ For HGTV's new show Get Out, Way Out! - a new show that centers on extreme patios decked out with state-of-the-art surround sound stereo systems, big screen televisions and fully equipped kitchens - the award-winning creative design studio nailgun* created a truly tantalizing show open/package featuring a dozen seconds of vibrant, tightly-edited 3D animated backyard transformations. Get Out, Way Out! airs Wednesdays at 9:30pm on HGTV.
+ 3dtotal has published a new 3dsmax tutorial by Shishir Singh on using FumeFX to create a fire effect.+ Digital-Tutors, an Adobe® Certified Expert, today announced the availability of 'Introduction to Photoshop CS3' - the latest release in a growing library of interactive training for emerging digital artists using Adobe Photoshop CS3. 'Introduction to Photoshop CS3' provides 6 hours of project-based training and teaches artists a non-destructive workflow to image editing in Photoshop CS3 and time-saving techniques to help artists finish projects with less time and greater creativity - an ideal training solution for artists in Print, Web, Multimedia, and Design.+ XSI Gigapolygon Core, optimized subdivision surface modeling, Delta Referencing, Built-in XSI Illusion compositor are among Top 10 Reasons to try Softimage XSI.
Labels:

Free Vectors


Free stuff always welcomed. So Download a basket full of Vector arts, free of cost from Vecteezy.com. This site indexes free vectors in many formats such as adobe illustrator's .ai, CorelDraw’s .cdr, Etc. and made by da best designer from all over the world :)Download link

ZMapper plug-in Released 4 ZBrush ***

Pixologic, Inc. Announced the release of ZMapper a free plug-in for current registered ZBrush users.ZMapper is a normal map generation plug-in for ZBrush 2. ZMapper expands upon ZBrush's robust normal map generating ability by including extensive configurability and presets, the pioneering morphUV function, the ability to roll a bump map into your normal map, arbitrary mesh support and several other innovative features that are designed to make normal map generation simple, fast and direct.Pixologic ZMapper plug-in for ZBrush Link

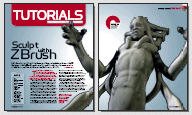
Free Tutorial : Sculpt with ZBrush!!

The world of visual effects has been revolutionised by tools like ZBrush. Far more accessible than the first generation of modelling software, this organic sculpting package enables artists with limited technical expertise to turn their designs into 3D models, bridging the gap between concept art and final digital product. 3D World has published a new Zbrush tutorial, in which CG Artist Zack Petroc explains the techniques he uses to transform a simple low-res mesh into a terrifying creature..You can download the tutorial files (50mb) and .pdf tutorial files for free from thier website......Link!!

FWA Hall of Fame

To celebrate the FWA's 7th birthday, Rob and all announce the FWAHall of Fame at thefwa.org. Keep up the good work guys!

PV Feather for Adobe After Effects

PV Feather is RE:Vision Effects new plugin for Adobe After Effects. PV Feather offers better feathering control within After Effects. PV Feather (the "PV" stands for "per vertex") performs feathering by using an inner mask for filling, and an outer mask for feather control. The amount of feather is controlled by the distance between the inner and outer mask. The PV Feather plugin for AE is released for both Windows and Mac, and compatible with After Effects 6.5 +up, including recently released After Effects CS3. For Demo and more information please visit http://www.revisionfx.com/.

Filters, VFX Plugins For Photoshop And After Effects

Have a look at some Really cool, Task specific plugins for Adobe Photoshop and After Effects by VFX Plugins software developer Alpha Plugins. Water For AE: This set of additional modules allows to create various video effects of flowing water. You can easily to create a jet of water or pouring water into glass. Also it lets create fantastic transition effects. Fire3 for Photoshop: Fire3 is a powerful mean what helps you to make various types of flame. It’s a plug-in module for Adobe Photoshop and compatibles. Fire3 allows to burn any objects, layers or selected areas on your composition. You can adjust a lot of parameters and easy create very realistic fires or some fantastic fires that impossible in real life....and many more useful VFX plugins like these!!Download VFX plugins by AlphaPlugins by visiting - Download pluginsRelated posts:FREE Deep Paint 2.0 ***Free Plugin Presets 4 After EffectsTwisting Pixels, VFX and photoshop pluginsVFX Plugin For After Effects - GridIron Nucleo Pro Now Shipping

Digimation Releases Max Monster Pak With Bonus 3ds Max Plug-ins

It seems that 3d Models and Textures are every where and the demand of 3d products are hitting all time high. Now Digimation has announced Max Monster Pak; a collection of more than 13,000 3D models, textures and motion capture files for users. As far as in my knowledge it is never seen before offer; as they are offering ten of Digimation's most popular plug-ins for 3ds Max including; Bones Pro 3, Tree Factory, Chameleon, Max Sculpt, Clay Studio, DigiPeople, Sand Blaster, etc for first fifty customers. Its a win-win situation man... so if got some "G",- it's a prefect and value for money offer to invest In..............more info!!Related Posts:3D models Collection of Apple Products EverMotion Released Archmodels Vol.27 and 28 CGIndia Released, Free 3D Models Collection V1 ArchVision Releases New 3D Casual People CollectionDosch Design has Released New 3d models and Textures Products

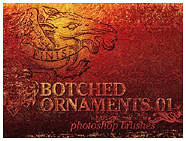
Free Photoshop Brushes: Botched Ornaments !!

Very useful and Free Photoshop brushes for Photoshop addicts. These Photoshop brushes are from the collection of graphic artist Gustaf Fjelstrom.The Botched Ornaments 01 are made up of a handful of decorative elements each distressed to varying degrees. The images were sourced from an old clip-art book, scanned, cleaned up, and weathered accordingly. I’ve left all the brushes in their raw, default state, with the assumption that one would want to fiddle with their own fine-tunings, jitter, flow, Intensity, etc...................Download Link!!