making of sirens

Our latest Digital Painting tutorial is by Jimi Benedict, and he shows us how he went about creating his image, Sirens using Photoshop.

SAN JOSE, Calif. - (May 31, 2007) — Adobe Systems Incorporated (Nasdaq:ADBE) and Google Inc. (Nasdaq: GOOG) today announced the Photoshop® CS3 Extended plug-in for the Google 3D Warehouse, enabling Adobe® Photoshop CS3 Extended users to take further advantage of the software’s powerful compositing, painting and image-editing toolset for editing 3D content. With the plugin, users will be able to query and download free 3D content from the Google 3D Warehouse, Google’s free online repository for 3D models and content, directly within Photoshop CS3 Extended. 3D Content then can be placed, manipulated and used in composites with the new 3D tools in Photoshop CS3 Extended. The plugin is available for free download from the Adobe Labs Web site at http://labs.adobe.com/.
Labels: photoshop plugins
 Very useful and Free Photoshop brushes for Photoshop addicts. These Photoshop brushes are from the collection of graphic artist Gustaf Fjelstrom.The Botched Ornaments 01 are made up of a handful of decorative elements each distressed to varying degrees. The images were sourced from an old clip-art book, scanned, cleaned up, and weathered accordingly. I’ve left all the brushes in their raw, default state, with the assumption that one would want to fiddle with their own fine-tunings, jitter, flow, Intensity, etc...................Download Link!!
 Photoshop tutorial. If you want to render any kind of frosted glass, you have to think about to notable increase of rendering time.
My personal solution is to render “normal” glasses with our render engines, and after abtain any kind of glass playing with Photoshop. You could be make many kind of Glasses in few seconds!
A software like Photoshop could be very, very helpfully to refine scenes: stop to make 3d images directly with your 3d studio max or Maya… think your render as a first part. The second one will be the photo retouch!
Follow this great tutorial:
Glass with photoshop
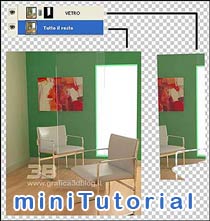
 In Photoshop cs2 you can find a new feature named Vanish point.
If you want to replace same parts of your picture but you have problems with perspective, for exemple with bricked wall or wood floor, you can easly do it using the new option: Vanish point!
You can create your reference grid and use replacement tool (like clone tool) respecting your reference grid and your perspective.
Here 2 useful videotutorials to learn how to do it in deep:
Photoshop support: Vanish point
Watch and Learn: Vanish point
